Introduction:
In this experiment, we aim to create an automated Water Irrigation System for plants. The system uses a Raspberry Pi Pico, L293D motor driver, and a water pump motor to control the flow of water to plants. By using basic control logic, the water pump can be activated to irrigate the plants automatically.
Scope:
This system demonstrates how to automate the watering process for plants using low-cost microcontrollers. The project can be extended for smart agricultural systems, greenhouse management, or home gardening by integrating sensors such as soil moisture sensors or water level sensors.
Prerequisite:
3.1. Hardware:
Pico microcontroller
Water pump motor
L293D Motor Driver
Power Supply Breakout Board
Tubing For Water Flow
Breadboard
Jumper wires
USB cable (to connect the computer)
3 .2. Software:
Thonny Software(For micro python)
MicroPython firmware installed on Raspberry Pi Pico
ubuntu Terminal(For embedded C)
CMake,Pico SDK,GNU Arm Embedded Toolchain,WSL.
Connection Details:
Power Supply Connections
Raspberry Pi Pico is powered using a 5V supply from the breakout board.
L293D Motor Driver and water pump are powered using the same supply.
L293D to Pico Connections
Pin 1 (Enable 1-2) of L293D is connected to 3.3V from the Pico.
Pin 2 (Input 1) to GPIO 15 of the Pico.
Pin 7 (Input 2) to GPIO 14 of the Pico.
Pin 4, 5, 12, 13 are grounded.
Pin 16 (VCC) to 5V.
Pin 8 (V motor) to 12V (external) for the motor.
Motor Connections
Pin 3 (Output 1) of L293D to the positive terminal of the motor.
Pin 6 (Output 2) to the negative terminal of the motor.

Working Principle:
The working principle is simple:
The L293D motor driver controls the water pump motor connected to it.
The Pico sends control signals (HIGH/LOW) to the motor driver IC, which in turn drives the motor.
Once the motor is activated, it pumps water through the connected tube.
The system can be further enhanced by adding sensors to automatically trigger watering based on moisture levels.
Centrifugal Pump

The centrifugal pump converts rotational kinetic energy into hydrodynamic energy to transport fluid. The rotation energy comes from the electric motor. The fluid enters the pump impeller along or near the rotating shaft, is accelerated by the impeller, flows radially outward into the diffuser or volute chamber, and then flows out from there.
Common uses of centrifugal pumps include water, sewage, agricultural, petroleum, and petrochemical pumping.
IC L293D(Used as Power Switching Transistors)
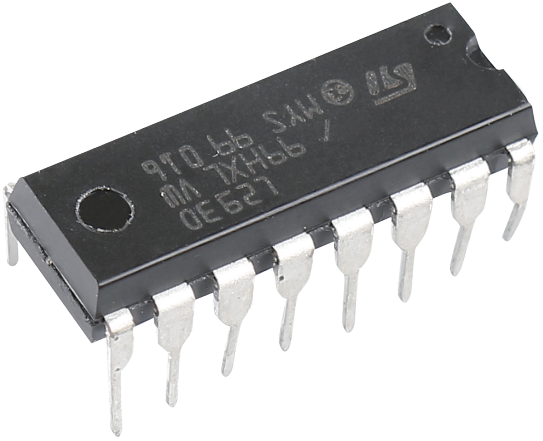
L293D is a 4-channel motor driver integrated by chip with high voltage and high current. It’s designed to connect to standard DTL, TTL logic level, and drive inductive loads (such as relay coils, DC, Stepper Motors) and power switching transistors etc. DC Motors are devices that turn DC electrical energy into mechanical energy. They are widely used in electrical drive for their superior speed regulation performance.
See the figure of pins below. L293D has two pins (Vcc1 and Vcc2) for power supply. Vcc2 is used to supply power for the motor, while Vcc1 to supply for the chip. Since a small-sized DC motor is used here, connect both pins to +5V.

The following is the internal structure of L293D. Pin EN is an enable pin and only works with high level; A stands for input and Y for output. You can see the relationship among them at the right bottom. When pin EN is High level, if A is High, Y outputs high level; if A is Low, Y outputs Low level. When pin EN is Low level, the L293D does not work.

Application code:
MicroPython:
import machine
import utime
# Define motor control pins
motor1A = machine.Pin(14, machine.Pin.OUT)
motor2A = machine.Pin(15, machine.Pin.OUT)
def start_motor():
motor1A.high() # Set motor direction
motor2A.low() # Enable motor
def stop_motor():
motor1A.low() # Turn off motor
motor2A.low() # Ensure both pins are low
# Main program loop
try:
while True:
start_motor() # Start the motor
utime.sleep(5) # Run the motor for 5 seconds
stop_motor() # Stop the motor
utime.sleep(10) # Wait for 10 seconds before the next cycle
except KeyboardInterrupt:
stop_motor() # Stop the motor on exit
print("Motor stopped.")
Embedded C:
#include "pico/stdlib.h"
// Define motor control pins
#define MOTOR_PIN_1 14 // Input pin for motor direction A
#define MOTOR_PIN_2 15 // Input pin for motor direction B
// Function to initialize GPIO pins
void motor_init() {
gpio_init(MOTOR_PIN_1); // Initialize pin for motor direction A
gpio_set_dir(MOTOR_PIN_1, GPIO_OUT); // Set pin as output
gpio_init(MOTOR_PIN_2); // Initialize pin for motor direction B
gpio_set_dir(MOTOR_PIN_2, GPIO_OUT); // Set pin as output
}
// Function to start the motor
void start_motor() {
gpio_put(MOTOR_PIN_1, 1); // Set motor direction A HIGH
gpio_put(MOTOR_PIN_2, 0); // Set motor direction B LOW
}
// Function to stop the motor
void stop_motor() {
gpio_put(MOTOR_PIN_1, 0); // Set motor direction A LOW
gpio_put(MOTOR_PIN_2, 0); // Set motor direction B LOW
}
int main() {
stdio_init_all(); // Initialize stdio for debugging (optional)
motor_init(); // Initialize the motor control pins
while (true) {
start_motor(); // Start the motor
sleep_ms(5000); // Run the motor for 5 seconds
stop_motor(); // Stop the motor
sleep_ms(10000); // Wait for 10 seconds before next cycle
}
}
Hardware Image:
Output:
When the system is powered:
The pump motor will run, and water will flow through the tube to irrigate the plants.
The motor runs for a specified time (e.g., 5 seconds), and then stops for another interval.
Video Demonstration:
Appendix:
Common CMakeLists:
cmake_minimum_required(VERSION 3.12)
# Pull in SDK (must be before project)
include(pico_sdk_import.cmake)
project(pico_experiments C CXX ASM)
set(CMAKE_C_STANDARD 11)
set(CMAKE_CXX_STANDARD 17)
if (PICO_SDK_VERSION_STRING VERSION_LESS "1.3.0")
message(FATAL_ERROR "Raspberry Pi Pico SDK version 1.3.0 (or later) required. Your version is ${PICO_SDK_VERSION_STRING}")
endif()
# Initialize the SDK
pico_sdk_init()
add_compile_options(-Wall
-Wno-format # int != int32_t as far as the compiler is concerned because gcc has int32_t as long int
-Wno-unused-function # we have some for the docs that arent called
)
if (CMAKE_C_COMPILER_ID STREQUAL "GNU")
add_compile_options(-Wno-maybe-uninitialized)
endif()
# Hardware-specific examples in subdirectories:
add_subdirectory(expt_10_LCD)
CMakeLists:
cmake_minimum_required(VERSION 3.13)
# Define the project name
project(motor_control)
# Specify Pico SDK path
set(PICO_SDK_PATH "/path_to_your_pico_sdk")
# Initialize the SDK
include(${PICO_SDK_PATH}/pico_sdk_init.cmake)
pico_sdk_init()
# Define executable
add_executable(motor_control main.c)
# Link libraries
target_link_libraries(motor_control pico_stdlib)
# Enable USB output
pico_enable_stdio_usb(motor_control 1)
# Enable UART output
pico_enable_stdio_uart(motor_control 0)
# Create hex/bin file
pico_add_extra_outputs(motor_control)
References:
| # | Topic | Date & time | Action |
|---|
0% Completed (0/1)